It’s so easy to ignore IPv6. Our networks have all been happily grinding away on IPv4. And those boffins who came up with the idea of NAT, that’s saved us all from having to worry about the ever shrinking pool of available addresses. Nobody likes change. IPv6 is confusing. And whose idea was it to put letters in IP addresses anyway!?
But IPv6 isn’t going away. Since World IPv6 Day on January 12th 2011, the rate of adoption has been steadily increasing. Google is currently showing that around 25% of traffic they see is IPv6 traffic. So I decided it was time for me to see what all the fuss was about and flick the switch enabling IPv6 on my home network.
Turns out the process wasn’t quite as simple as flicking a switch, and there was no magical checkbox I could tick to say ‘give me some IPv6, please.’ I had to work for it. But I had some fun doing it, and learnt a thing or two along the way, and isn’t that what its really all about anyway.
So for a bit of background; My internet connection is ADSL and authentication is done with PPPoE (this would prove to be a slight sticking point, but we’ll get to that in a minute). My ISP was kind enough to provide me with a /56 subnet to play with.
When I first embarked on this IPv6 journey I was using a PaloAlto PA-200 as my gateway device. Solid piece of kit, but I was extremely disappointed to learn that PA don’t support IPv6 over PPPoE. One option was to set up some other device on the WAN side of the firewall to handle PPPoE and give me an ethernet handoff, which would mean double NAT-ing IPv4 traffic and the whole thing would have ended up being way too messy and complicated. Fortunately, I was able to get my hands on a Fortigate 60D. And yes, Fortigate do support IPv6 over PPPoE. Now we’re getting somewhere.
I’m going to skip over the IPv4 setup because there’s nothing new and exciting there. Once that was out of the way, I turned my attention to getting IPv6 sorted. First step was to enable IPv6 under System -> Feature Visibility. Then the rough plan was to go about IPv6 the same way I’d do IPv4 – Add some addresses to some interfaces, put in a security policy or 2, maybe think about some routes… and see what happens. Spoiler: Nothing happened! It just would not work. It felt very much like I was missing something – a setting that I just could not locate anywhere in the web GUI. So as all good network engineers do, I turned to Google for answers. And it turns out I was right. There are some settings for IPv6 that must be configured through the CLI.
Grab your SSH client of choice and log into your Fortigate. Lets start with the WAN interface.
config system interface
    edit "wan1"
        config ipv6
            set ip6-mode pppoe
            set ip6-allowaccess ping
            set dhcp6-prefix-delegation enable
            set autoconf enable
        end
    next
end
Line by line explanation of what’s happening here:
- set ip6-mode pppoe – we want to grab our IP address from PPPoE/
- set ip6-allowaccess ping – Allow the WAN interface to respond to ping/
- set dhcp6-prefix-delegation enable – This line allows us to accept prefix delegation from the ISP. It’s how we the ISP assigns IPs to non-edge devices.
- set autoconf enable – Autoconf enables this interface to pick up an address automatically via SLAAC.
Now to get the internal interface setup. There are quite a few options here that simply don’t exist in the GUI – at least not that I could find.
config system interface
    edit "internal"
        config ipv6
            set ip6-mode delegated
            set ip6-allowaccess ping https ssh http fgfm capwap
            set ip6-send-adv enable
            set ip6-other-flag enable
            set ip6-upstream-interface "wan1"
            set ip6-subnet ::1/64
            config ip6-delegated-prefix-list
                edit 1
                    set upstream-interface "wan1"
                    set autonomous-flag enable
                    set onlink-flag enable
                    set subnet 2001:xxxx:yyyy:zzzz::/64
                next
            end
        end
    next
end
As above, here’s an an explanation of each line:
- set ip6-mode delegated – This tells the interface to get it’s IP via protocol delegation
- set ip6-allowaccess ping https ssh http fgfm capwap – Protocols that are allowed access to the firewall on this interface.
- set ip6-send-adv enable – Here we’re IPv6 Router Advertisements to be sent from this interface.
- set ip6-other-flag enable – We’re using SLAAC to assign IP addresses to internal devices. SLAAC doesn’t configure things like DNS settings, so this option tells internal devices to still get some info from DHCP where available.
- set ip6-upstream-interface “wan1” – This is where our delegated addresses come from.
- set ip6-subnet ::1/64 – Assign the first address in the /64 range to this interface.
The next few lines under config ip6-delegated-prefix-list are used to hand out IP addresses to clients in this itnerface:
- set upstream-interface “wan1” – As above, delegated IP addresses are coming from WAN1.
- set autonomous-flag enable – This allows clients to build their global IPv6 address using their 64-bit interface identifier and the prefix provided.
- set onlink-flag enable – In IPv6, by default, a host treats only the link-local prefix as on-link. We want the address assigned here to be on-link as well.
- set subnet 2001:xxxx:yyyy:zzzz::/64 – This is where we start carving up the /56 from the ISP into /64’s.
At this stage you should be able to get an IPv6 address on your device, but as mentioned above you wont have any DNS6 addresses. So lets fix that up real quick:
config system dhcp6 server
    edit 1
        set interface "internal"
        set dns-server1 2620:119:35::35
        set dns-server2 2620:119:53::53
    next
end
Fairly obvious what’s going on here. Primary and secondary DNS servers are being handed out via DHCPv6 on the internal interface.
Add a quick any/any rule for traffic from internal to wan1 and you’re in business:
config firewall policy6
    edit 1
        set name "Internal to Internet IPv6"
        set srcintf "internal"
        set dstintf "wan1"
        set srcaddr "all"
        set dstaddr "all"
        set action accept
        set schedule "always"
        set service "ALL"
        set logtraffic all
    next
end
Note: Don’t do this in production – please put some thought into your firewall rules.
Now it’s time to test. Renew your IP address on your PC and ping google.com – you should get a reply from one of those weird looking IPv6 addresses.
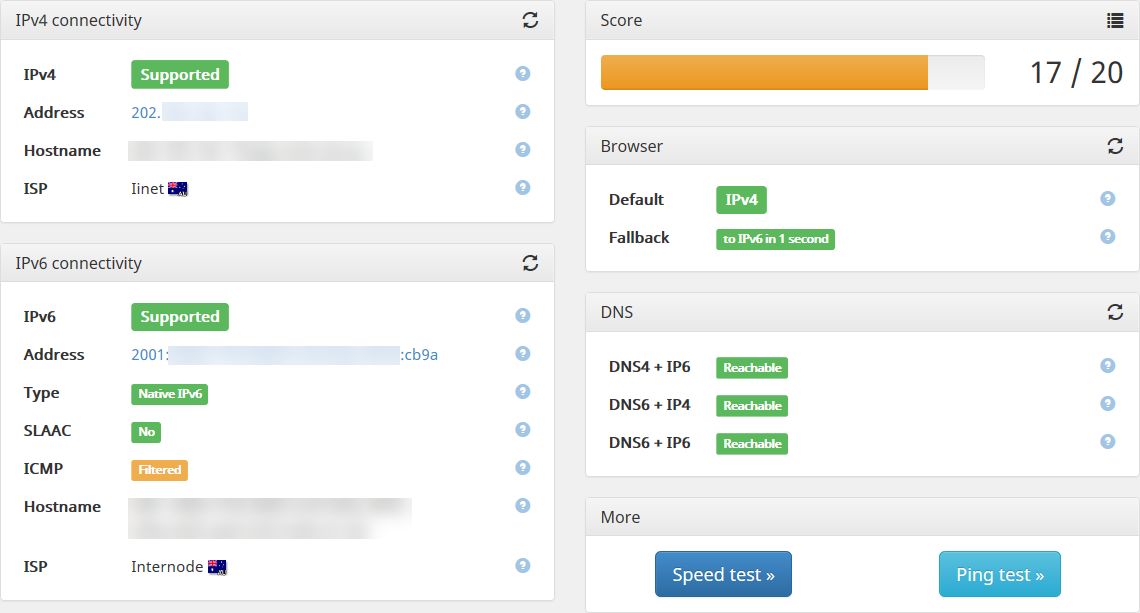
I had mixed results with ipv6-test.com. More often than not it would show IPv6 not supported when I tested in Firefox. Getting positive results all round when using other browsers.

For fun, I’ve also installed the SixOrNot addon in Firefox so I can see which sites are loading over IPv6 and which are still using IPv4.
